Showing posts with label diy. Show all posts
Showing posts with label diy. Show all posts
Wednesday, June 4, 2014
update to my new summer dress
A few days ago I posted a refashion of a new summer dress made from two old shirts. I told you I was planning to use the band from the printed shirt to make a belt. I didn't take any pictures of the process but it was very simple. I just folded the strip right sides together and sewed a straight seam the length of the band. Turned it right side out and just slid it over a brown leather belt that I already had. It's not permanent, so I can slide it off and wear my leather belt without the sleeve on it. Here is a picture of me wearing my new dress before work one day. It was about 4:45 a.m. and I woke hubby up to take my picture so I could show you all how it looked. He thought that I had lost my mind. So many times after a refashion he takes my picture with no makeup and ugly hair and I just don't want to post it. This one was blog-acceptable.
Monday, May 26, 2014
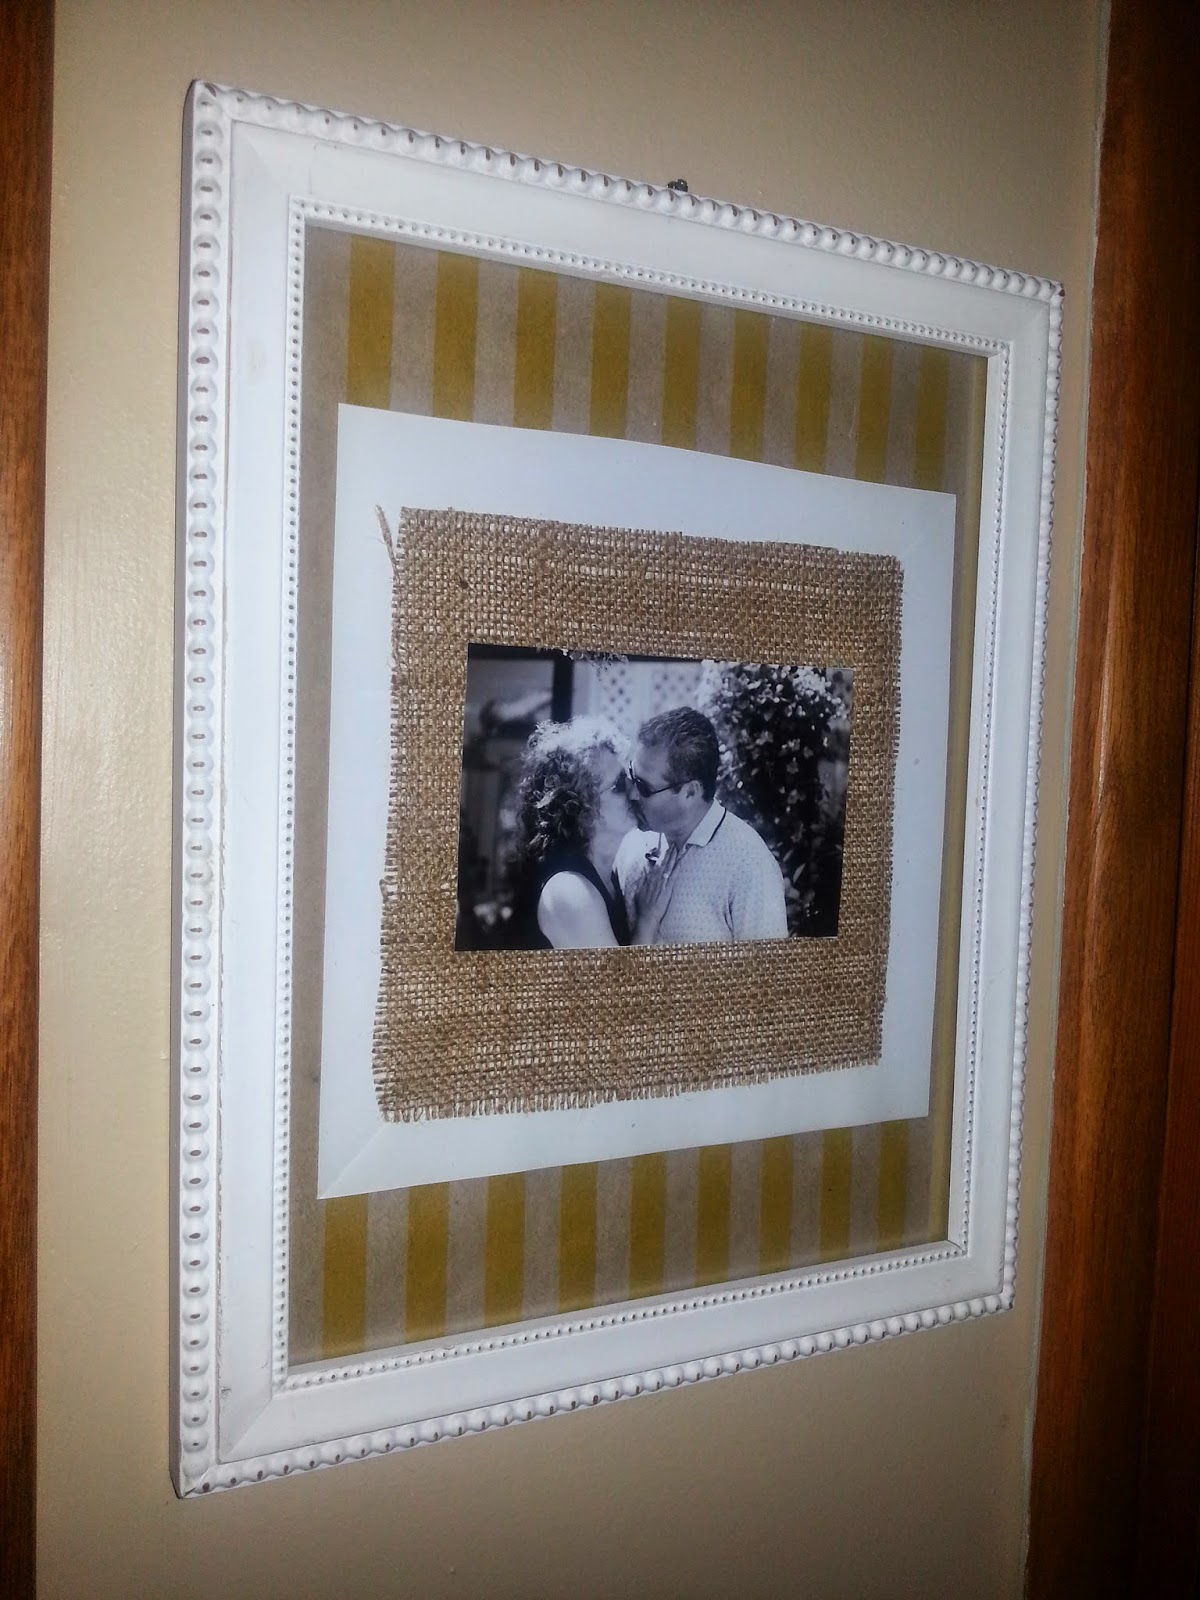
free custom frame
I love free stuff, who doesn't right? My husband picked up this frame for me before it hit the dumpster at his sister's house. I just love that man. I took the frame apart and added a few touches to customize it for our bedroom. I found this wrapping paper at dollar tree a few months back and loved the colors. I'm using alot of yellow in our bedroom now and I loved the natural color because it reminds me of burlap. After he brought the frame home, I had a great plan to update it for our bedroom with one of my favorite pictures of us taken years ago on a trip to Rhode Island. This is a very simple update. I wrapped the bottom part of the frame with the wrapping paper and just cut a piece of burlap a little larger than the actual picture. I cut the white paper that comes inside the frame a little larger than the burlap. I guess you would say I layered it.


Saturday, April 26, 2014
Fancy towels on the cheap
Here's a quick update to the Dollar store towels that I updated. First I added the ribbon to the towels just to fancy them up. I used about a yard of ribbon to complete all three towel at .49 cents a yard. I was shopping in the Dollar Tree near my office and I came across these cute flowers. Both flowers were on a card for $1.00. Here you have it my quick update to my cheap towels. Green towels $2.00 each, blue towel I already had, .49 cents worth of ribbon and $1.00 for flowers = Towels that are two cute!!!!!

Monday, April 14, 2014
Spring bathroom update
Spring has finally arrived in Western Pennsylvania, outside and inside. This redo is one that is out of my comfort zone, but I wanted something bright and cheery in my bathroom. Once I commit to something I go full force. I couldn’t just stop with the bright shower curtain, I had to keep going with the entire bathroom. I will be showing you all my little projects that didn’t cost much at all. I shopped my house first and just had to buy some ribbon to complete the projects. Starting with the shower curtain, I found this at the Dollar store on clearance for $8.00. The rug was $10.00.

![]()
![]()
Next up, hand towels. The green ones I purchased new at the dollar store for $2.00 each. The blue ones I already had. I just used the same ribbon and added to the towels to make them look a litter more coordinated and high end.
See the big “O” that was gift from my sister-in-law a few years ago. You never know where that thing will show up in the house. Next up, The glass candle holder. The base is a soup can. Yep, that’s what it is. I just covered it with burlap ribbon that I had leftover from another project. The width of the ribbon was the perfect size. The glass top is a coche, flipped upside down and is sitting inside the soup can. One of my dear friends makes her own soap and she is nice enough to give me samples. I just added them to the inside.
There you have it, my new spring bathroom on the cheap. I’m very happy with the finished product.
Moving on to the curtains, I had these in my stash in the basement that I purchased at a yard sale for $1.00. They were tab curtain panels. I simply cut off the top tabs and about another 4 inches, I used one panel on each window. They were a little boring so I bought some ribbon from Walmart that was 49 cents a yard. I just added the ribbon to the bottom of each panel just for some color.
 |
| before |
 |
| after |
 | ||||
before
|

Saturday, February 8, 2014
soup can to candleholder
Cheap and simple is what I love. I took the label off of a soup can that I just used, painted it black with just plain old craft paint and added a candle that I already had.
Here is a few different looks. The first one has a little piece of burlap glued around it with a very simple primitive star glued to the burlap. Acceptable but not great.
Second one is the keeper. I found a piece of burlap ribbon that I bought at Dollar general and tied it around the candle. I like this one much better and it found a home in my almost finished office.


Wednesday, February 5, 2014
cigar box lamp
I found this cigar box in my stash of wanna-be projects to complete. The lamp I picked up at a yard sale for $.75. After some playing around this is how she turned out.

![]()

![]()
 A little bit of liquid nails and I attached the lamp to the box. I may add a little something to the shade and the base of the lamp, but for now this is how she looks. Pretty cool project for a grand total of 75 cents. I will be linking up to:
Monday, February 3, 2014
Irish Blessing
The Irish blessing was always my Dad's favorite prayer, I decided that I wanted to display it somewhere in my house and my office seemed the perfect spot. I had the letters printed in vinyl with the intention of adding to a wall, but after I thought about I decided to put it on a large canvas so it would be portable. I like to change things up!


Saturday, February 1, 2014
Bulletin board
Just a quick addition to my office redo. I purchased this bulletin board at Ollies for $4.99. I like the color because it wasn't the tradional cork with the bleached wood. I just added a "G" letter hook that I picked up at Good Will a while back for 49 cents. The letter and hook were just a basic white, I added some gray paint to coordinate and this is how she looks.
 The office is coming along, I still want to paint a few things but that is going to have to wait until the weather gets above zero.
Thursday, January 30, 2014
step stool to small bookshelf
Continuing with my office redo projects, I needed space for my books since I reinvented my old bookshelf to a hutch for my desk. The temperature outside today in Western Pennsylvania is Zero, it's snowing and blowing and I did not want to leave the house. After shopping my house for something to use, I came up with this small stepstool that Sister number 3 gave me awhile ago to refurbish. Perfect and even better I didn't have to make any changes to it. I sat this baby on top of my file cabinet and the paperbacks fit perfect.
 No cost, no work = Functional and cute. That is my kind of project.
Tuesday, January 28, 2014
Motivational Art
Very cheap and quick artwork for my office walls. I purchased 3 canvases from Ollie's for $1.69 each, a book of scrapbook paper for $4.99 and vinyl letters leftover from a previous trip to Ollies.
I wrapped and stapled (with just a plain old office stapler) the scrapbook paper around the canvases. After checking pinterest for some inspirational quotes, I used my vinyl letters and just stuck them on the canvases.

![]()

![]()

I like this view from my desk chair it a nice reminder to stay motivated!
I wrapped and stapled (with just a plain old office stapler) the scrapbook paper around the canvases. After checking pinterest for some inspirational quotes, I used my vinyl letters and just stuck them on the canvases.
Friday, March 22, 2013
Lamp redo
I found this lamp at the consigment store that I sell items out of. I traded this lamp for a display stand that I didn't want anymore. That makes the cost zero. This was the exact size that I needed for my porch, I liked the color of the shade but it needed a little something.

I glued sisal around the base of the lamp and made a few burlap rosettes for the shade. Here she is all dressed up.


close up of the shade

close up of the base
This is a no cost project because I had all the supplies and I didn't pay anything for the lamp.
Wednesday, February 27, 2013
Dogzilla garbage can project
This is an update to my post from a few weeks back. Hubby made a garbage can to keep Dogzilla Windsor out of the garbage. We've been using it for a few weeks now but I just got around to finishing my part. I stained the oak trim because I like the grain to show through and painted the rest because it was just particle board leftover from another project. I'm very happy with the final product and best of all it keeps this little guy out of my garbage.


 |
| close up view of the top I'll be linking up to:   |
Thursday, February 21, 2013
Birthday Party Take II
More pictures of my Granddaughter Mya's 5th Birthday party. The theme from this year's party was "Fancy Nancy Soiree" I would like to congratulate my daughter on these party preparations. She did an amazing job. The party started off with a photo booth.

...next up were french manicures

....next station was the flip flop station.

All the girls were provided a pair of flip flops and they chose the fabric from the container and created their own designs. I have to admit this was a huge hit with the girls and their mothers.
Each one of the little princesses were given a party favor. Their very own tumblers. The back of the tumblers had each little girls name personalized.

Here is a picture of the table before all the guests arrived. She recycled frappucino bottles. She added Eiffel towers in pink and dipped the bottles into pink sprinkles to add the pink to the rims. Inside was a paper black and white straw. Once the little guests arrived the bottles were filled with pink birthday punch a.k.a. pink lemonade.
You can see the pink cake pops in the center of the table also.

 |
| close up of the frappucino bottles |
I have to say again what a great job my daughter did with this party. Every little girl left the party with not only 1 but 2 gifts to take home, their very own designed flip flops and a personalized tumbler.
You may be thinking what an expense this was. I can honestly say that my daughter is more frugal than I am. She has her own vinyl cutter so all the decorations and props were created by her. I have a few friends from work that donated the frappucino bottles. Thank Melissa and Jen for consuming all those calories and caffeine to help make Mya's birthday party such a success.
I think she has a future in party planning.

Here's the birthday girl riding her new scooter from Gammy and Papa.
 |
| Mya and Gammy having fun in the photo booth |
 |
| Papa being crazy |
Subscribe to:
Posts (Atom)