Monday, December 31, 2012

Grown up Christmas Gifts


I love, love, love all my gifts this year. Hubby bought me a tablet so I can check all my blogs while I’m sitting on the couch. Awesome gift. My kids bought me a case for my tablet in my favorite color "orange.” An outfit to walk the dog,so now I will be styling when I’m dog walking. This awesome pillow that my daughter ordered for me from Feather Hen.etsy.com

And this book. …………….


I’m 99% sure that my daughter did all the shopping for her brother too. So thank you so much Kylee Elizabeth you did a great job. I love all my gifts, they are the perfect size and color you know me so well. I love having a grown up daughter/best friend.

Sunday, December 30, 2012

RUSTOLEUM MAGNETIC PAINT


First let me say that I love this product.

This is my first attempt and it worked perfect for my project. If you follow my blog you know that I have a huge family and so does my husband. Every year we receive family pictures from both our extended families. I always display them on the side of my refrigerator.

After some remodeling this year we recessed our refrigerator so I don’t have the space for my family pictures. I was determined that I was going to come up with a new solution. Here is what I came up with….


I painted a large square on our old ugly pantry door. This was another remodel project, this door used to be the entrance to our screened in porch but hubby knocked out the window beside it and added a sliding glass door, which is now the new entrance to the porch. He built a closet behind the old door and it’s now our pantry that holds all my big kitchen appliances. This door is original to the house and it’s in the perfect location to house all our family pictures. I measured the size of the square that I wanted. I layed out all my pictures and decided the size that I needed. I marked it all off with a sharpie and a level and just started to paint.


 After painting the first coat and letting  it dry the magnets weren’t sticking. I was starting to panic. Coat number 2 was a little better but still not perfect. I was determined that this was going to work because I did not want to hear the hubs complaining that I ruined the ugly door. For some reason when he complains that makes me more determined to prove that my project “is” going to work. Before I painted coat number 3 I stirred and stirred the paint and stirred it again. I read somewhere that all the magnetic chips end up at the bottom of the paint can. This time it worked like a charm. Here’s the finished product.


Now when I get new pictures I just slide out the old one and add the new one.Our extended family keeps growing so I made sure I have space left for new additions. I purchased all of these magnetic sleeves from Walmart. They hold a 4x6 picture.

I'll be linking up to: Monday2 Make the Scene Monday #56Keeping It SimplePhotobucket


Friday, December 14, 2012

Santa Puppy

Here are two more of my favorite things.  My puppy and my Granddaughter.


This is Windsor all dressed up for his Christmas picture.  Ha ha ha, my hubby and son were not very happy with me.  I bought him a size large Santa suit and he was stuffed in it like a sausage.  I couldn't even get the santa hat up on his head.  Well I think he looks adorable. I had Christmas cards made up to send to a few family members, neighbors and friends.  Hubby thinks I've lost my mind.

Wednesday, December 12, 2012

easy dog bed cover Take II

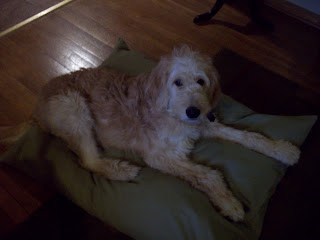
Our  golden doodle or as my Granddaughter calls him a "wacka doodle" has chewed threw his bed twice already.  First cover I made out of an old sheet and just slipped his bed into it.  After a couple months he chewed threw the sheet so I decided to go with something a little heavier.  I found some duck cloth in my fabric stash and covered it again.

All I did was measure the size of his bed and cut the fabric 1 inch wider and longer.  I folded the fabric in half. 

I folded the front and back of the fabric  down about 1/2" and ironed it.  Right sides together.  Just sew down both sides of the fabric.  Leaving the top folded side open.  I reinforced the seams so Wacka doodle couldn't rip them apart.  Snip your corners and turn the cover right side out.

You should end up with a big square that is closed on 3 sides and opened on one side.  Slip your dog bed inside and hand sew the open edge.  This will give you the ability to rip out the hand sewing and take off the cover to launder it.


I thinks he likes it.  I told him if he chews threw this one he is sleeping on the floor. So far so good.

Thank god I know how to sew or I would have had to buy 3 dog beds and at $35.00 a shot I would not be a very happy camper.  

I'll be linking up to:


Monday, December 10, 2012

small table redo

This is another of my yard sale purchases.  This small table was very sturdy but just a little too boring for my liking. For $1.00 she was coming home with me.

I added some black paint to the top.


Still seemed a little to boring. So I got hubby to drill some holes in the top so I could add upholstery tacs.


Still needs a little something..............


I found a stencil that I thought would work well.  I added some gray homemade chalk paint and here she is, looking much better.


One coat of hand wax later and she is ready for resale.

I'll be linking up to:MakeitPrettyMonday


Monday, December 3, 2012

Thank you gifts

Here's a thank you gift idea that I made for all my customers.  Just a little something to say Happy Holidays and thank you for your business.


purse size hand sanitizers in 3 different styles


Close up of the tags